


[ad_1]
Do you want assist constructing a WordPress website on Azure? This text walks you thru making a WordPress website with Azure App Service.

We are going to begin this information with a fast overview that introduces you to Azure App Service. After that, the information discusses the steps to deploy a WordPress website on Azure App Service.
Then, you’ll study the steps so as to add and validate a customized area for the WordPress website. I additionally included a FAQ part that solutions frequent questions on this subject.
Overview

Azure App Service is a Platform as a Service (PaaS) platform that features WordPress. With Azure’s WordPress PaaS, you don’t want to fret in regards to the underlying infrastructure internet hosting your website.
All you do is deploy the app, and Microsoft Azure takes care of the VMs, storage, Digital Networks, and gateways.
Whenever you create a WordPress website with the Azure App Service, it creates the Azure assets proven within the screenshot beneath.

Deploy WordPress Web site on Azure App Service

- Open portal.azure.com and check in. After signing in, click on the menu and choose “Create a brand new useful resource.”

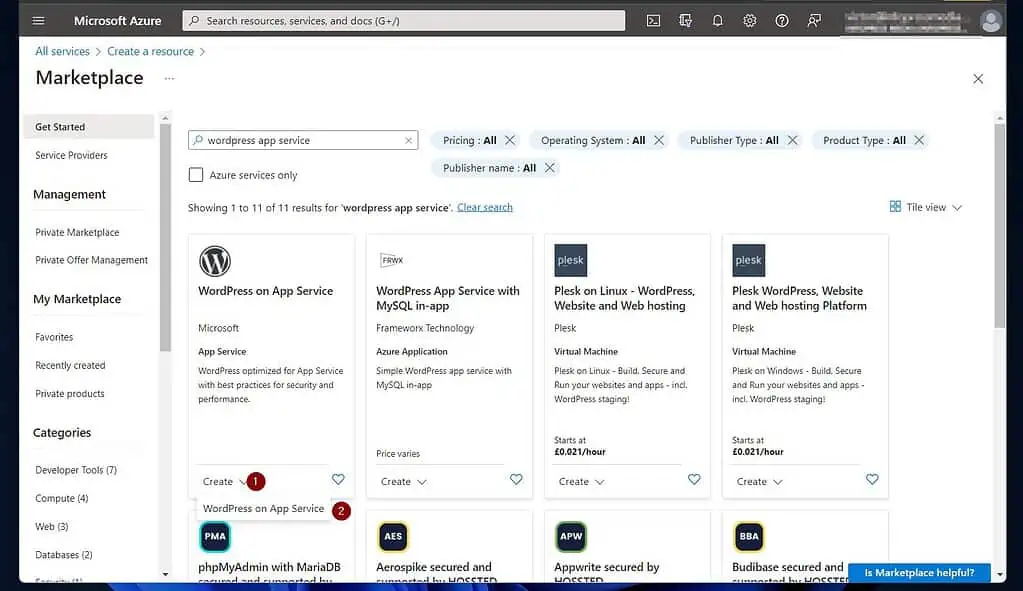
- Then, search “wordpress app service” and choose it.

- As soon as the Azure Market opens, click on the “Create” drop-down on the “WordPress on App Service” useful resource by Microsoft – then select “WordPress on App Service.”
- On the brand new app web page, choose a subscription and a Useful resource group. For those who wouldn’t have an modifying Useful resource group, click on “Create new” to create a brand new one.
Moreover, choose the Azure Area to host the title and the app’s title. Additionally, select an Azure WordPress internet hosting plan.
Azure selects the “Normal” internet hosting plan by default. To evaluate the internet hosting plans and select a special one, click on “Change plan.”
The second screenshot beneath exhibits the worth comparability desk for out there Azure WordPress internet hosting plans as of July 2, 2023. Some components of the comparability desk are hidden within the picture. However the components proven spotlight the variations within the internet hosting plans. To make use of the Azure Monitor autoscaling function and Diagnostic setting (mentioned later), you have to use not less than the “Normal S1” internet hosting plan.


- After that, scroll right down to the “WordPress setup” part and enter the required particulars. Whenever you end, click on “Subsequent: Superior >.”
Notice the admin e-mail, username, and password, as you’ll want them to check in to your website.

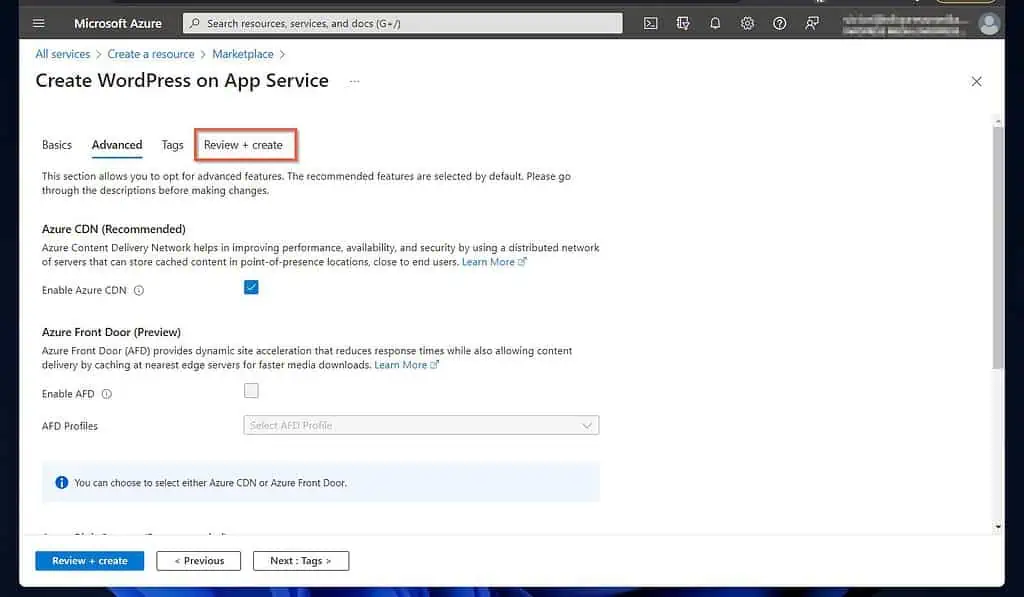
- The superior web page of the wizard gives the choice to make use of Azure CDN or Azure Entrance Door.
Azure Entrance Door was on Preview once I wrote this information in July 2023

Moreover, enabling Azure Blob Storage is out there on the Superior tab. That is non-compulsory however advisable for manufacturing websites.
There may be additionally the choice to configure the Digital Community (VNet) for the WordPress website App Service. For those who wouldn’t have an present VNet or don’t wish to use present ones, Azure creates a brand new one.

- After including all of the app particulars, except you wish to add tags, click on “Assessment + create.” Then, watch for Azure to validate your configuration.

- Lastly, to deploy the WordPress website with Azure App Service, click on Create. Then, watch for the app to be created by the Azure portal.
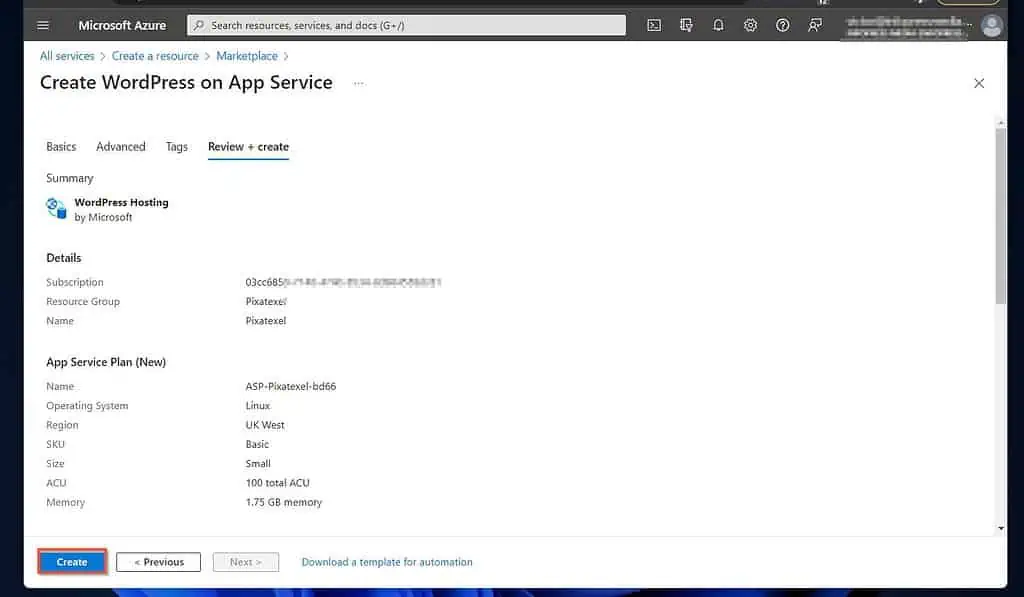
When the app deployment completes, click on “Go to useful resource,” then proceed to the subsequent step beneath.

Add a Customized Area and a Managed Certificates

Whenever you arrange a WordPress web site on App Service, the default area of the web site is <appname>.azurewebsites.web.
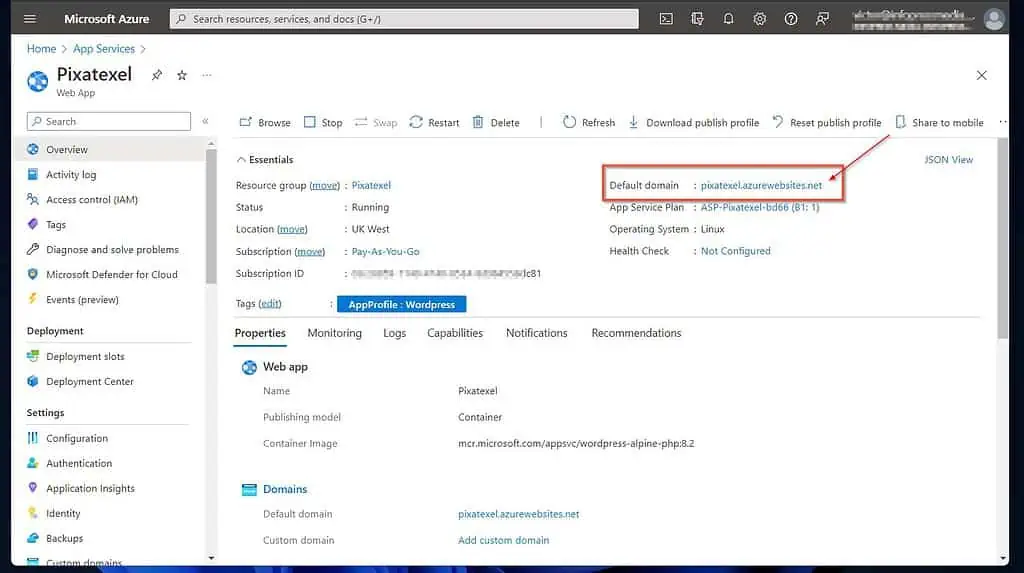
Nevertheless, you possibly can modify this to a customized area corresponding to DomainName.com.
The next subsections clarify the steps to finish this activity.
1 of three: Add a Customized Area to the Azure App
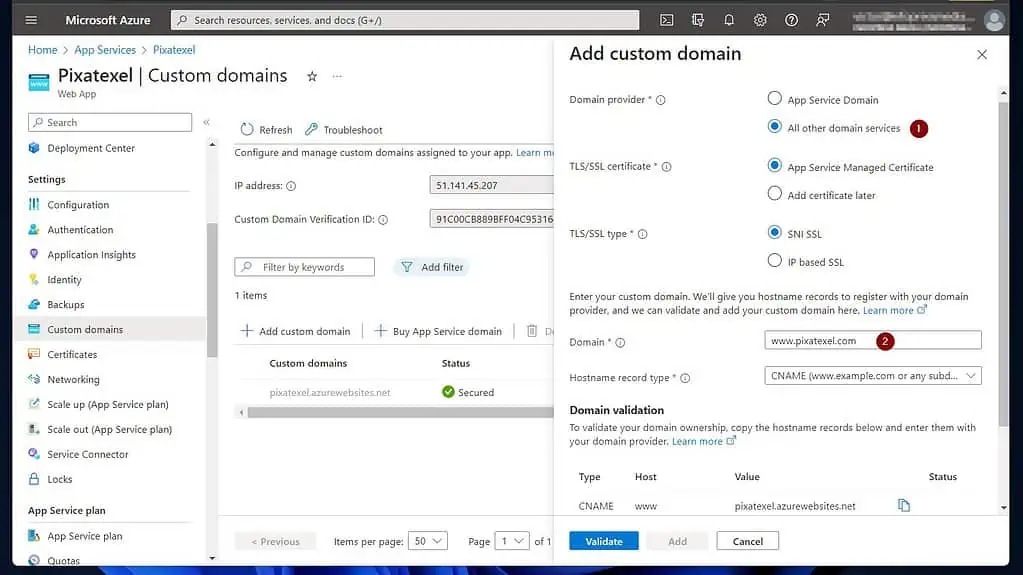
- On the left pane of the applying, select “Customized domains.” After that, click on “+ Add customized domains.”

- Then, on the “Add customized area” flyout, choose “All different area providers.” After that, enter the area title within the “Area” subject.
When you try this, Azure shows DNS data you have to create to confirm that you simply personal the area. These DNS data are displayed on the “Area validation” part of the flyout.
DO NOT click on Validate but. Go away this web page open. Then, check in to your area’s registrar on a brand new browser tab. See 2 of 4 beneath for the detailed steps.
2 of three: Create DNS Information on the Area’s Registrar
Cloudflare manages the DNS data for Pixatexel.com. So, I’ll check in to Cloudflare to create the verification DNS data.
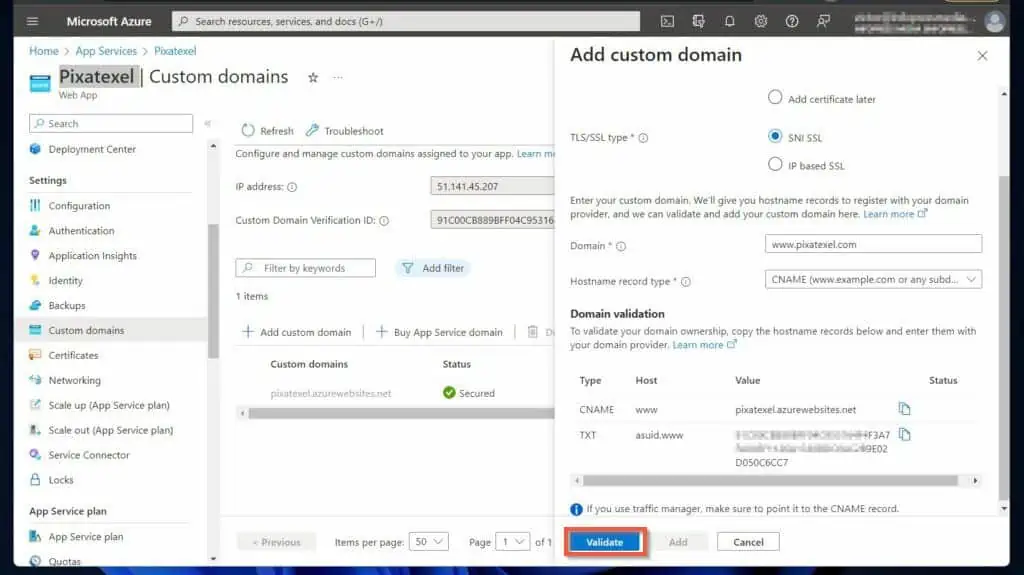
The “Area validation” part of the Azure customized area flyout requests me to create CNAME and TXT data.
For those who’re utilizing Cloudflare once you add the data, flip “Proxy standing” off.

After creating the DNS data, proceed to three of 4 beneath.
3 of three: Validate and Full the Customized Area Registration
- Return to the Azure App Service web page in your WordPress web site. On the backside of the “Add customized area” flyout, click on “Validate.”
- Azure will search for the data; if it finds them, the validation will return “handed.” To complete the method, click on “Add.” After that, watch for Azure so as to add the customized area and register the SSL certificates.
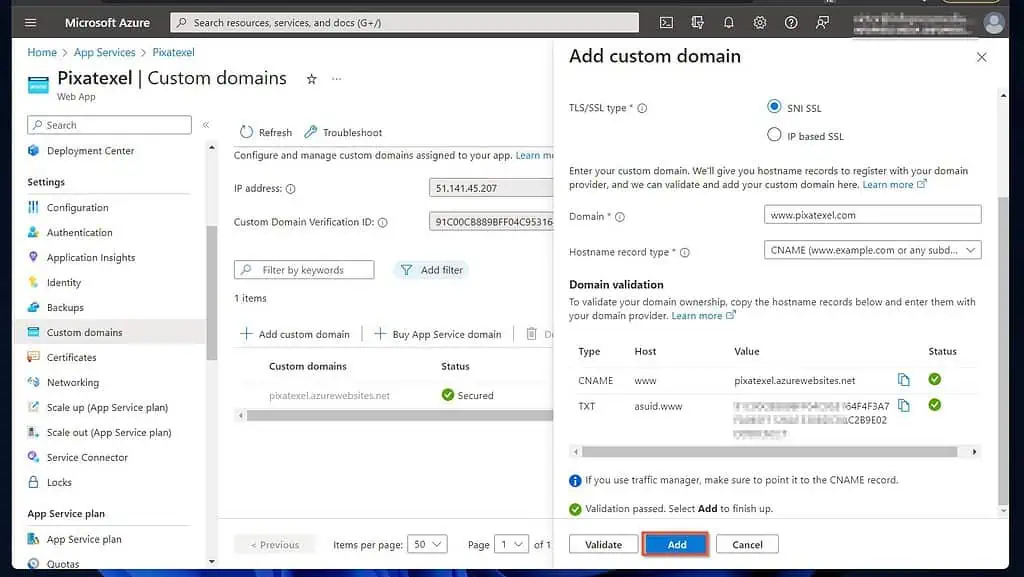
As soon as the customized area registration completes, the area shall be listed.

Regularly Requested Questions

Sure. Azure App Service lets you create and host net purposes in a number of programming languages.
The fantastic thing about Azure App Service is that it’s a PaaS providing, that means you don’t want to handle infrastructure like VMs.
There isn’t any easy reply to this query, as the price of internet hosting a WordPress web site on Azure will depend on a number of components.
Firstly, the associated fee will depend on the WordPress app internet hosting tier you select. Moreover, the associated fee is affected by different configurations.
Having mentioned all that, you possibly can estimate the price of your WordPress website by utilizing the Azure Pricing Calculator.
Sure. Azure is superb for internet hosting WordPress. Nevertheless, in case your WordPress web site doesn’t drive a lot site visitors, it could be higher to make use of low-cost WordPress internet hosting providers.
a) Register to portal.azure.com, click on on the menu, and select “Create a useful resource.”
b) Subsequent, search “wordpress on app service” and choose it from the outcomes.
c) Click on Create and full the app creation course of.
d) After creating the WordPress app, open it and click on “Customized domains.” After that, click on “+ Add customized domains.”
e) Enter a customized area in your WordPress web site, confirm it, and make it the default.
My Last Ideas
The Azure App Service is an effective way to host a WordPress web site with out an Azure VM or managing infrastructure. All that’s required is making a WordPress on App Service app.
After that, add and confirm a customized area in your WordPress web site. Lastly, open the positioning and full the WordPress set up.
References and Additional Studying
- Quickstart: Create a WordPress website – Azure App Service | Microsoft Study
- Tutorial: Safe app with a customized area and certificates – Azure App Service | Microsoft Study
[ad_2]
Source link

