


[ad_1]
Starting with Xcode 14, the Simulators for watchOS and tvOS can be found as separate downloads (iOS and macOS are nonetheless “built-in”). This reduces the app obtain measurement considerably, however it additionally implies that you now should handle these massive (3-4 GB) elements your self.
While you launch Xcode 14 the primary time, you might be prompted to obtain extra platforms. One other immediate is displayed if you attempt to run a goal for a platform with out a runtime.
However what are these downloads and the place are they saved?
The primary trace is if you have a look at Disk Utility. You’ll see a bunch of latest “Simulator” volumes mounted below Disk Photographs:
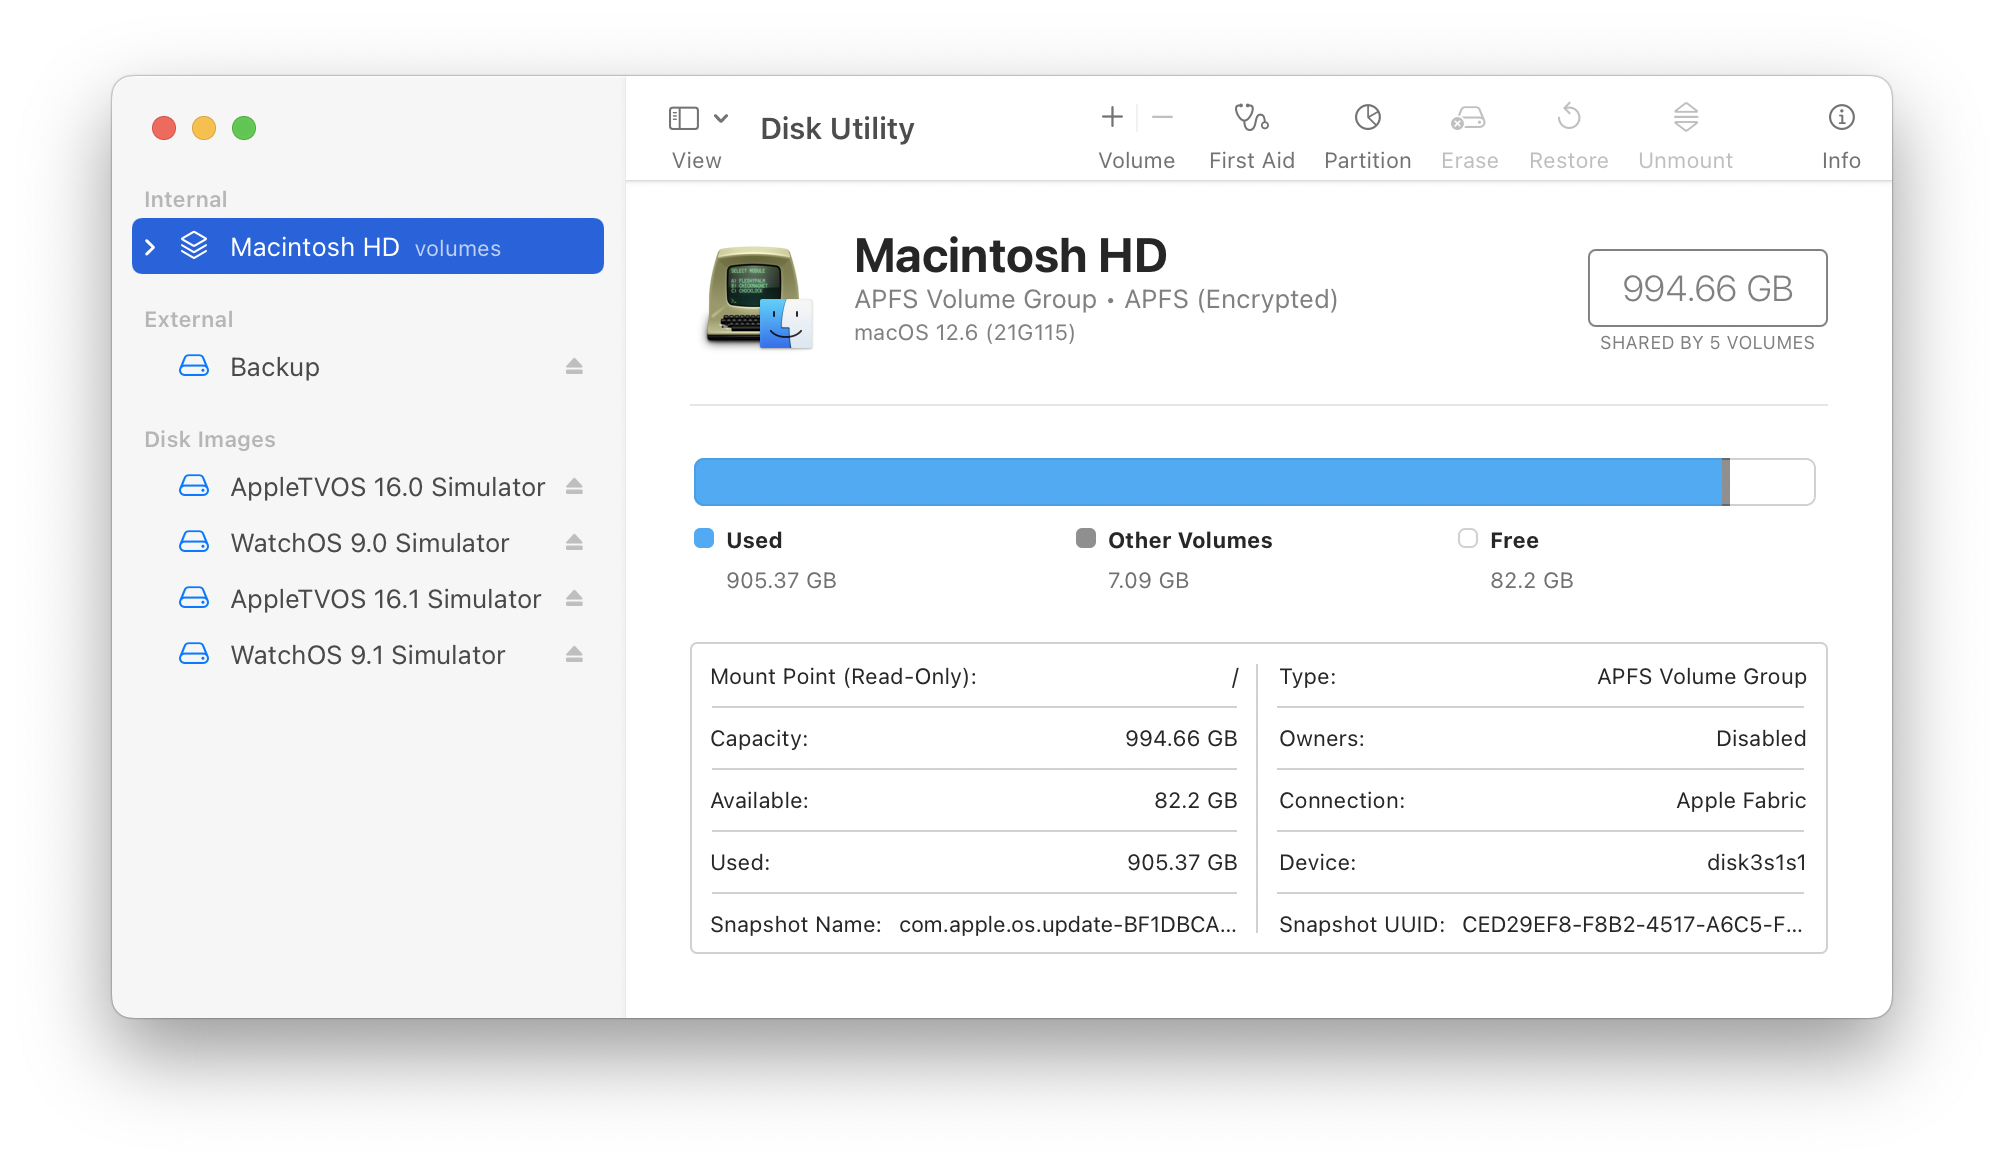
When you choose these volumes, you’ll see that all of them mount at /Library/Developer/CoreSimulator/Volumes. Inside every quantity you’ll discover a authorized PDF and a path to a .simruntime bundle in a Runtimes listing. This construction is identical as extra iOS runtimes in /Library/Developer/CoreSimulator/Profile/Runtimes. These .simruntime packages include all the data wanted to simulate the machine.
Now that you realize what Xcode is utilizing, you’ll marvel the place it’s getting the disk picture. It’s situated in a sibling listing: /Library/Developer/CoreSimulator/Photographs. That folder additionally comprises an photographs.plist file that comprises metadata for the disk photographs. There are solely a handful of recordsdata there, however on my Mac they use 13 GB of disk house.
And up till a few hours in the past, that folder contained 7 GB of knowledge that was incompatible with the present model of Xcode. I needed to delete these recordsdata manually. However how?
The only method to handle this house is utilizing the brand new Platforms panel in Xcode preferences:
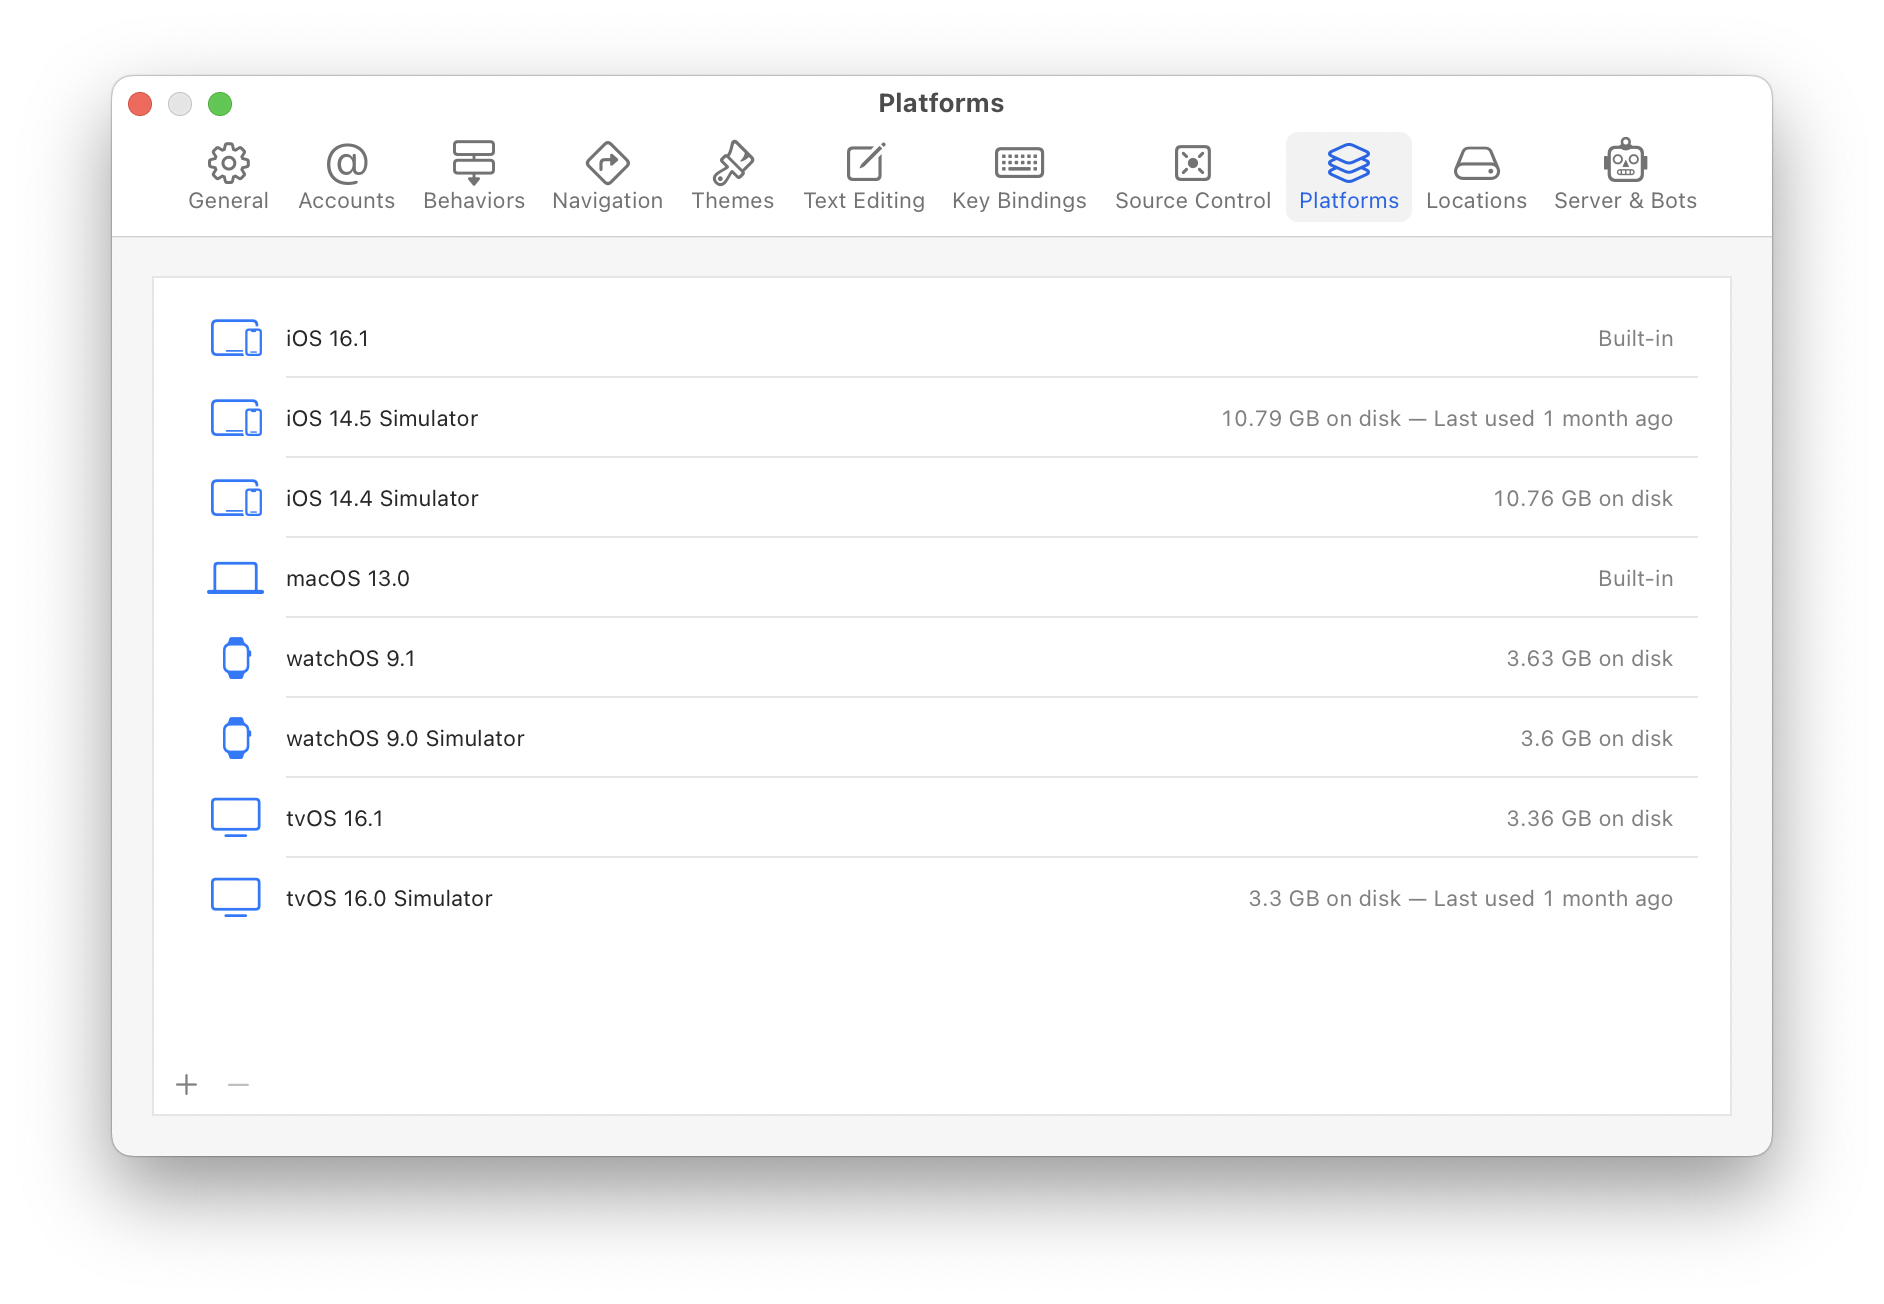
This window additionally exhibits if you final used the runtime: within the screenshot above it’s clear that I can eliminate the iOS 14 and tvOS 16.0 runtimes and save about 25 GB of storage. It’s straightforward to get these runtimes again if wanted, simply press the + button. (After downloading a brand new runtime, it may be used within the Units & Simulator home windows to create a brand new take a look at machine.)
If the command line is extra your factor, you should utilize xcrun to collect the identical data:
$ xcrun simctl runtime checklist
Add a -v choice there if you would like extra particulars (from the photographs.plist talked about above). To delete any one of many gadgets listed, use the listed GUID on this command:
$ xcrun simctl runtime delete <GUID>
Ultimately, this quick put up saved me 32 GB of disk house. In the event you’re growing for platforms aside from the present iOS, you’ll probably see one thing related. As time passes, you’ll must manually control these things: Xcode can’t clear issues up for you as a result of it has no thought what you want.
For extra particulars, try Apple’s documentation for putting in and managing Simulator runtimes. Thanks go to Jason Yao for helping me figure out a bunch of these things!
[ad_2]
Source link

